Domoticz is a powerful open-source home automation platform that can be easily installed on a Raspberry Pi. With this you can easily transform your house in a smart house. Below you will find a step-by-step guide to install Domoticz on a Raspberry Pi.
Supplies:
Steps:
1. Install the operating system
Read How to install a Raspberry Pi It gives you the complete guide to install a Raspberry.
2 Update the operating system
Open the terminal and run the following commands:
sudo apt updatesudo apt upgradeBy the way, it is a good thing if you run these commands regularly. Read the artice how to Automatic updates for Raspberry Pi
3. Install Domoticz:
Run the following commands to install Domoticz:
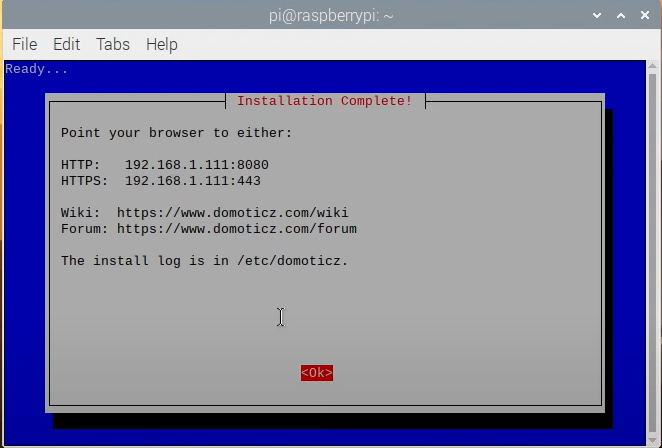
sudo bash -c "$(curl -sSfL https://install.domoticz.com)"Pay close attention when you come across this page. With the IP address behind HTTP you can access your installation of Domoticz.
4. Open Domoticz
Open a web browser and go to http://<your ip adress>:8080. This will take you to the Domoticz dashboard.
5. Start Domoticz:
If all this does not work, try starting Domoticz again
sudo service domoticz.sh startIf you can’t do it, please let me know in a comment below:
Leave a Reply