Many websites use RSS feeds to inform users and other applications about updates on their site. Most newssites and blogs have their own RSS feeds, but also the Forum of Mendix. If you look for it, they are easily to find , just look for the rss logo. Once you click the feed you will get a load of xml, forget about that and just copy the url you are interested in. So for the Mendix Forum it is: community.mendix.com/feed.xml .
Follow these steps to creat your own RSS feed driven app:
Download and install Studio Pro
First you have to install Mendix Studio Pro from https://marketplace.mendix.com/link/studiopro
I selected version 10.13.0, but all versions newer then 10.12.1 will do
Install the downloaded package, and select to start the modeler after installation
Create a new App
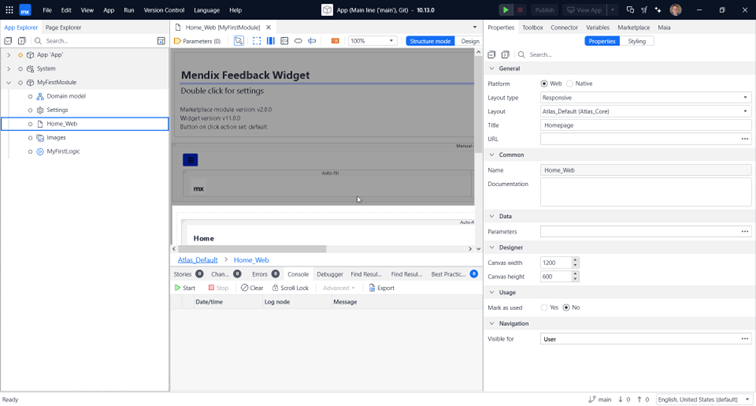
Now you can create a new app by hitting the create a new app. Select the template “Blank web app” This gives you a very easy to use template for you new app. Select all defaults and hit create app. After a few moments you will have a new app:
Download RSS reader module
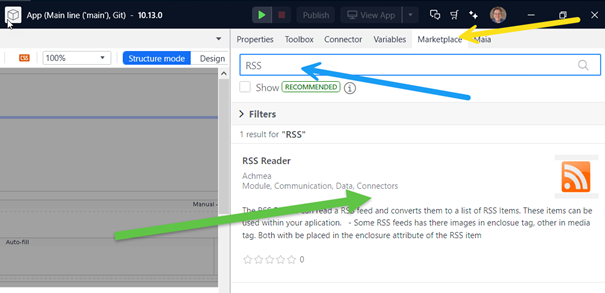
From the marketplace you can install the RSS reader module. To do that , just click the tab marketplace (yellow arrow) on the right and start searching for RSS (blue arrow and click the found RSS reader (green arrow):
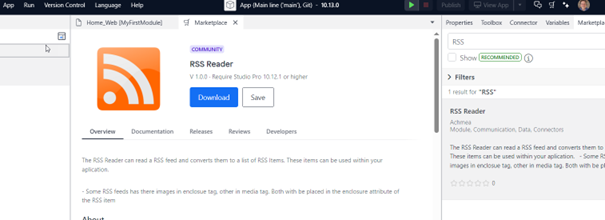
In the middle screen the RSS Reader is shown, hit the download button and wait till you get the conformation message
If you now click Add on on the left side, you will see that the RSS Reader is installed.
Create a microflow to use the RSS reader
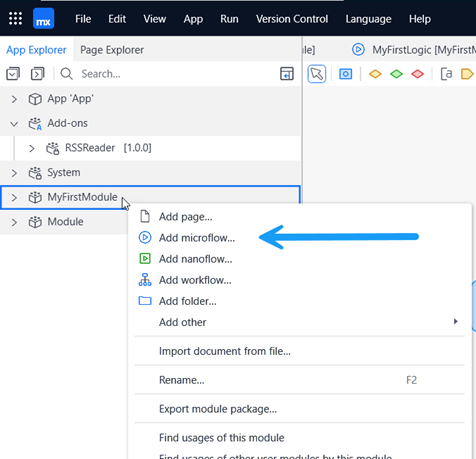
Now we will create a microflow that we can use as a datasource for a listview . Rightclick on ‘MyFirstModule’ on the left pane of the modeler and select ‘Add microflow’
Give the microflow the name ‘DS_ReedRSS’
Click OK and a new microflow screen opens.
Open the Logic folder of the RSSReader Addon and drag and drop the ReadRSS Activity on the line in the new created microflow:

Double-click the ReadRSS Activity , DoubleClick URL of the parameterscreen that has opened and select expression. Type in the editor the URL of the RSS feed you want to use between single quotes, in this example I use the rss feed of my Blog site (‘https://daik.nl/index.php/en/feed/’) , but you can use any RSS feed URL you like.
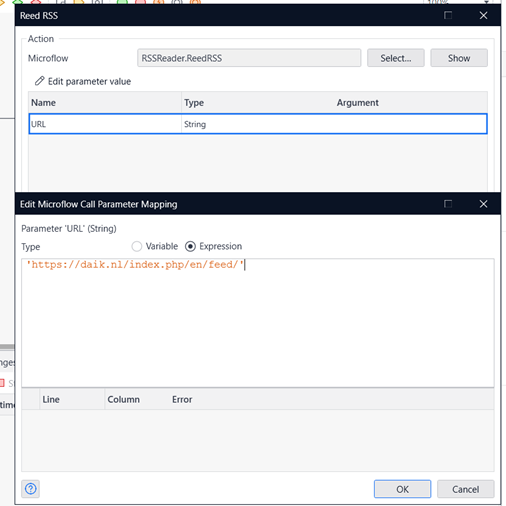
Click twice OK
Now right click the red end event dot (red arrow) and select properties. In the editor type $RSSFeedList (blue arrow) and Update the type to…. With the button at the yellow arrow.:

Then Click OK, and your microflow is ready
Create a new page with listview
Create a new page (rightclick MyFirstModule in the left pane, select Add Page)
Give the page a name “RSS Reader” , choose Blank in the left pane and choose Blank page in the middle pane:
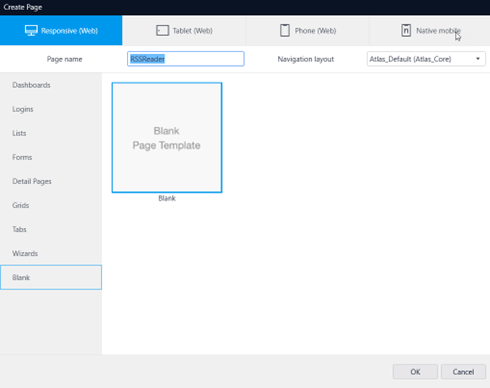
Click OK, and the new pages opens
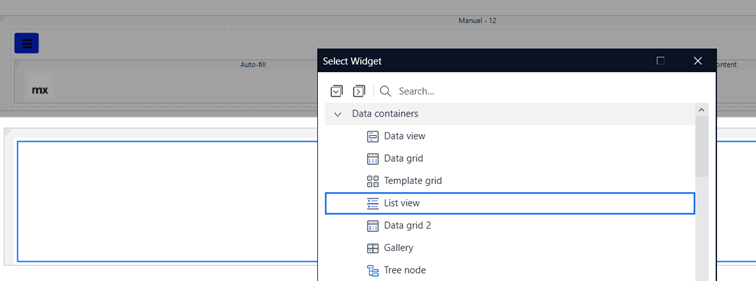
Click inside the new page and add a new widget, by rightclick inside the blue outlined box, and select List view:
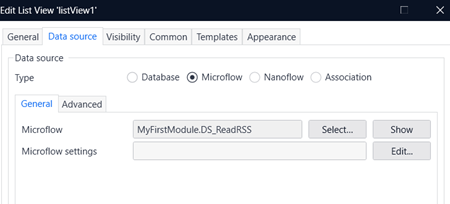
Double click the list view to open properties window. Open the datasource tab and select the earlier created microflow as a data source:
Click OK and answer the question “Do you automatically fill the …” question with No
Right click inside the new list view and add 2 new text widgets. Double click the first and edit the caption , set {1} to template and add the title as a new parameter:
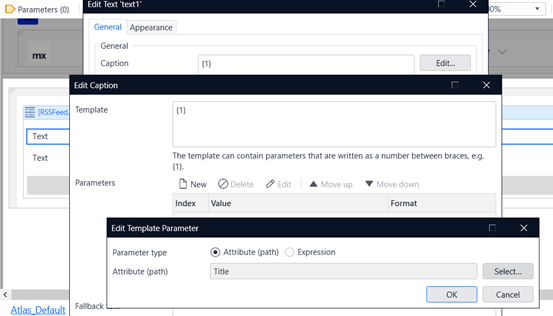
Click twice OK and select render mode heading 4 and click ok
Further you can add all other elements in the RSS feed you like, like image and so on. Now just start your application and see the result on http://locahost:8080.
As a demo app I created a news app that imports from 50+ sites with the same elements that are used in this tutorial, watch it on DAIK nieuws
There is even a seperatie page used for mobile, you can open it by scanning this QR code:



Leave a Reply